GUI in Rust with iced #1: Getting Started
Hey rustaceans! You are here probably because you googled a tutorial for iced and did not find anything else. I feel you. Let’s get this fixed and start hacking clear GUIs in rust using iced!
Foreword
I am writing this tutorial series as a learning experience to solidify my knowledge in rust and iced library. I will be releasing new tutorials and findings as I progress with my learning which I aim to be on a biweekly basis.
Therefore, I may not be knowledgeable enough to give you complete answers to underlying concepts of the library and rust. If you are still quite new to rust I would strongly recommend you to complete rustlings to get yourself started.
Intro: Elm lang and immediate vs retained modes
Iced is a retained mode library. To better understand what it means and what applications it will have on our development approach. Let’s first quickly define difference between immediate and retained modes.
Immediate vs retained modes
The main difference between is that retained mode library will retain (i.e. keep in memory) your GUI components
and store references to them. It will then update the scene (i.e. add() or remove() text) only when there is a message coming.
If you had an experience with JavaFX this is an equivalent to creating Button and Text objects and then adding them to the scene,
then adding click handler to the button which will change the text of the label.
Here is a small illustration:
...
//describes state of our application
int counter = 0;
//create a button and get reference to it
Button push = new Button("Push Me!");
//create a text label and get reference to it
Text text = new Text("Pushes: 0");
//set a click callback function
push.setOnAction(() -> {
    counter++;
    text.setText("Pushes: " + counter);
 });
//layout pane
StackPane pane = new StackPane();
//add button to the layout
pane.getChildren().add(push);
//add text to the layout
pane.getChildren().add(text);
//create our scene with pane layout
Scene scene = new Scene(pane, 300, 100);
//and add it to the application stage
stage.setScene(scene)
stage.show()
...
The immediate mode is procedural 1. Each components you add is rendered automatically and you interact with it immediately. It is now the application’s responsibility to store the GUI scene.
in immediate mode you show the button and interact with it immediately, and you do so every frame (e.g. 60 times per second). This means there is no need for any on-click handler, nor to store any reference to it. In egui this looks like this: if
ui.button("Save file").clicked() { save(file); }. 2
Generally, immediate mode GUIs can be seen in games where each frame is redrawn nonetheless. Retained mode libraries is the classic mode that is used by most popular GUI frameworks.
I will not go into too many details and pros and cons of each mode. You can read links I attached in footnotes which describe them very well.
Elm language & architecture
Iced is a cross-platform GUI library focused on simplicity and type-safety. Inspired by Elm.
As iced is primarily inspired by Elm GUI design philosophy, it is worth visiting elm’s guide to get a grasp of main concepts.
The language syntax may seem a little bit obscure, but you will then find a lot of similarities in rust.
In a nutshell, the pattern is based on message production and update of GUI state in functional fashion. Instead of callback functions and data bindings you draw the view conditionally based on the state. The state can be mutated through messages which are issued by the application. i.e.

Elm starts by rendering the initial value on screen. From there you enter into this loop:
- Wait for user input.
- Send a message to update
- Produce a new Model
- Call view to get new HTML
- Show the new HTML on screen
- Repeat!
I put a basic diagram to explain the flow of an application:

This is the basic theory you need to know to get started with iced.
Let’s get hacking
Let’s start with creating a basic counter in iced.
First create a directory and init a cargo project
mkdir icy_counter
cd icy_counter
cargo init
Navigate to Cargo.toml and add iced dependency with pure feature.
[package]
name = "part_one"
version = "0.1.0"
edition = "2021"

[dependencies]
iced = {version = "0.4", features = ["pure"]}
Go then to the main.rs and import these components which we’ll need for building our application later:
use iced::Settings;
use iced::pure::Sandbox;
use iced::pure::widget::{Button, Text, Column, Container};
Let’s then create a structure to represent the state of our application and call it Counter
struct Counter {
    count: i32
}
Our counter app will produce just two messages: Increment and Decrement, so let’s add those as an enum and call it CounterMessage
enum CounterMessage {
    Increment,
    Decrement
}
We then need to implement a Sandbox trait which gives us a lot of useful methods to works with.
If you are using VS code and rust-analyzer and implemented default member you should get something like this:
impl Sandbox for Counter {
    type Message = ();

    fn new() -> Self {
        todo!()
    }

    fn title(&self) -> String {
        todo!()
    }

    fn update(&mut self, message: Self::Message) {
        todo!()
    }

    fn view(&self) -> iced::pure::Element<'_, Self::Message> {
        todo!()
    }
}
Let’s break it down:
type Message = ()this is a type alias to the message type we are going to use in our applicationfn new() -> Selfinitialises the state of our applicationfn title(&self) -> Stringsets the title of the applicationfn update(&mut self, message: Self::Message)will receive messages of the type we defined earlier and mutate the state our application. (Hence why it is&mut self)fn view(&self) -> iced::pure::Element<'_, Self::Message>this is where we draw our GUI. Should return an iced element that will occupy our view
We already defined our Message CounterMessage. However, type Message also requires it to derive Debug trait.
We can simple do it by adding a decorator.
#[derive(Debug)]
enum CounterMessage {
    Increment,
    Decrement
}
Now, we can alias our enum:
- type Message = ();
+ type Message = CounterMessage;
In the counter app, the initial state of our application is counter = 0 so let’s set it:
fn new() -> Self {
    Counter{ count: 0 }
}
Setting title is also simple:
fn title(&self) -> String {
    String::from("Counter app")
}
Now, we are getting to the interesting part: mutating the state.
We want to increment our variable when we receive Increment message and decrement it when the message is Decrement.
As our message is enum, we can utilise rust’s amazing match pattern syntax in our update method. Since we passing &mut self we can then mutably borrow our count variable and modify it:
fn update(&mut self, message: Self::Message) {
    match message {
        CounterMessage::Increment => self.count += 1,
        CounterMessage::Decrement => self.count -= 1
    }
}
Looking good so far, isn’t it?
Let’s now draw our view and display the counter.
In the view(&self) method:
We start with a label.
let label = Text::new(format!("Count: {}", self.count));
Then, we can add button for increment and decrement.
let incr = Button::new("Increment").on_press(CounterMessage::Increment);
let decr = Button::new("Decrement").on_press(CounterMessage::Decrement);
The syntax is very simple. We create a button setting its label, then we set what message it will produce when pressed.
In our case we produce Counter::Increment for the increment button and CounterMessage::Decrement for the decrement button.
Now., let’s put everything inside a column
let col = Column::new().push(incr).push(label).push(decr);
Element will appear in order they are pushed. You might get a compiler error at this point. Something like
.push(incr)
   |          ---- ^^^^ the trait `Into<iced_pure::element::Element<'_, _, iced_graphics::renderer::Renderer<iced_wgpu::backend::Backend>>>` is not implemented for `iced_pure::widget::button::Button<'_, CounterMessage, iced_graphics::renderer::Renderer<iced_wgpu::backend::Backend>>`
This is because we broke down our UI component into variable. Essentially, we are building a composable view.
Essentially, when we push our buttons to the column, we are cloning (or copying if type can be stored on a stack) our messages to
a new element we produce. Hence, we need to derive Clone and Copy to do that:
- #[derive(Debug)]
+ #[derive(Debug, Clone, Copy)]
  enum CounterMessage {
       Increment,
       Decrement
   }
Now, let’s center elements using Container and return the final Element
Container::new(col).center_x().center_y().width(iced::Length::Fill).height(iced::Length::Fill).into()
We call .into() to convert our Container type into Element.
This is how iced demonstrated retained mode. We created element and retained them on the view.
Last step: let’s run our application with default settings from the main()
fn main() -> Result<(), iced::Error> {
    Counter::run(Settings::default())
}
Double check that your code looks something like that:
use iced::Settings;
use iced::pure::widget::{Button, Column, Container, Text};
use iced::pure::Sandbox;

fn main() -> Result<(), iced::Error> {
    Counter::run(Settings::default())
}

struct Counter {
    count: i32,
}

#[derive(Debug, Clone, Copy)]
enum CounterMessage {
    Increment,
    Decrement,
}

impl Sandbox for Counter {
    type Message = CounterMessage;

    fn new() -> Self {
        Counter { count: 0 }
    }

    fn title(&self) -> String {
        String::from("Counter app")
    }

    fn update(&mut self, message: Self::Message) {
        match message {
            CounterMessage::Increment => self.count += 1,
            CounterMessage::Decrement => self.count -= 1,
        }
    }

    fn view(&self) -> iced::pure::Element<Self::Message> {
        let label = Text::new(format!("Count: {}", self.count));
        let incr = Button::new("Increment").on_press(CounterMessage::Increment);
        let decr = Button::new("Decrement").on_press(CounterMessage::Decrement);
        let col = Column::new().push(incr).push(label).push(decr);
        Container::new(col).center_x().center_y().width(iced::Length::Fill).height(iced::Length::Fill).into()
    }
}
Now:
cargo run
And the final result:
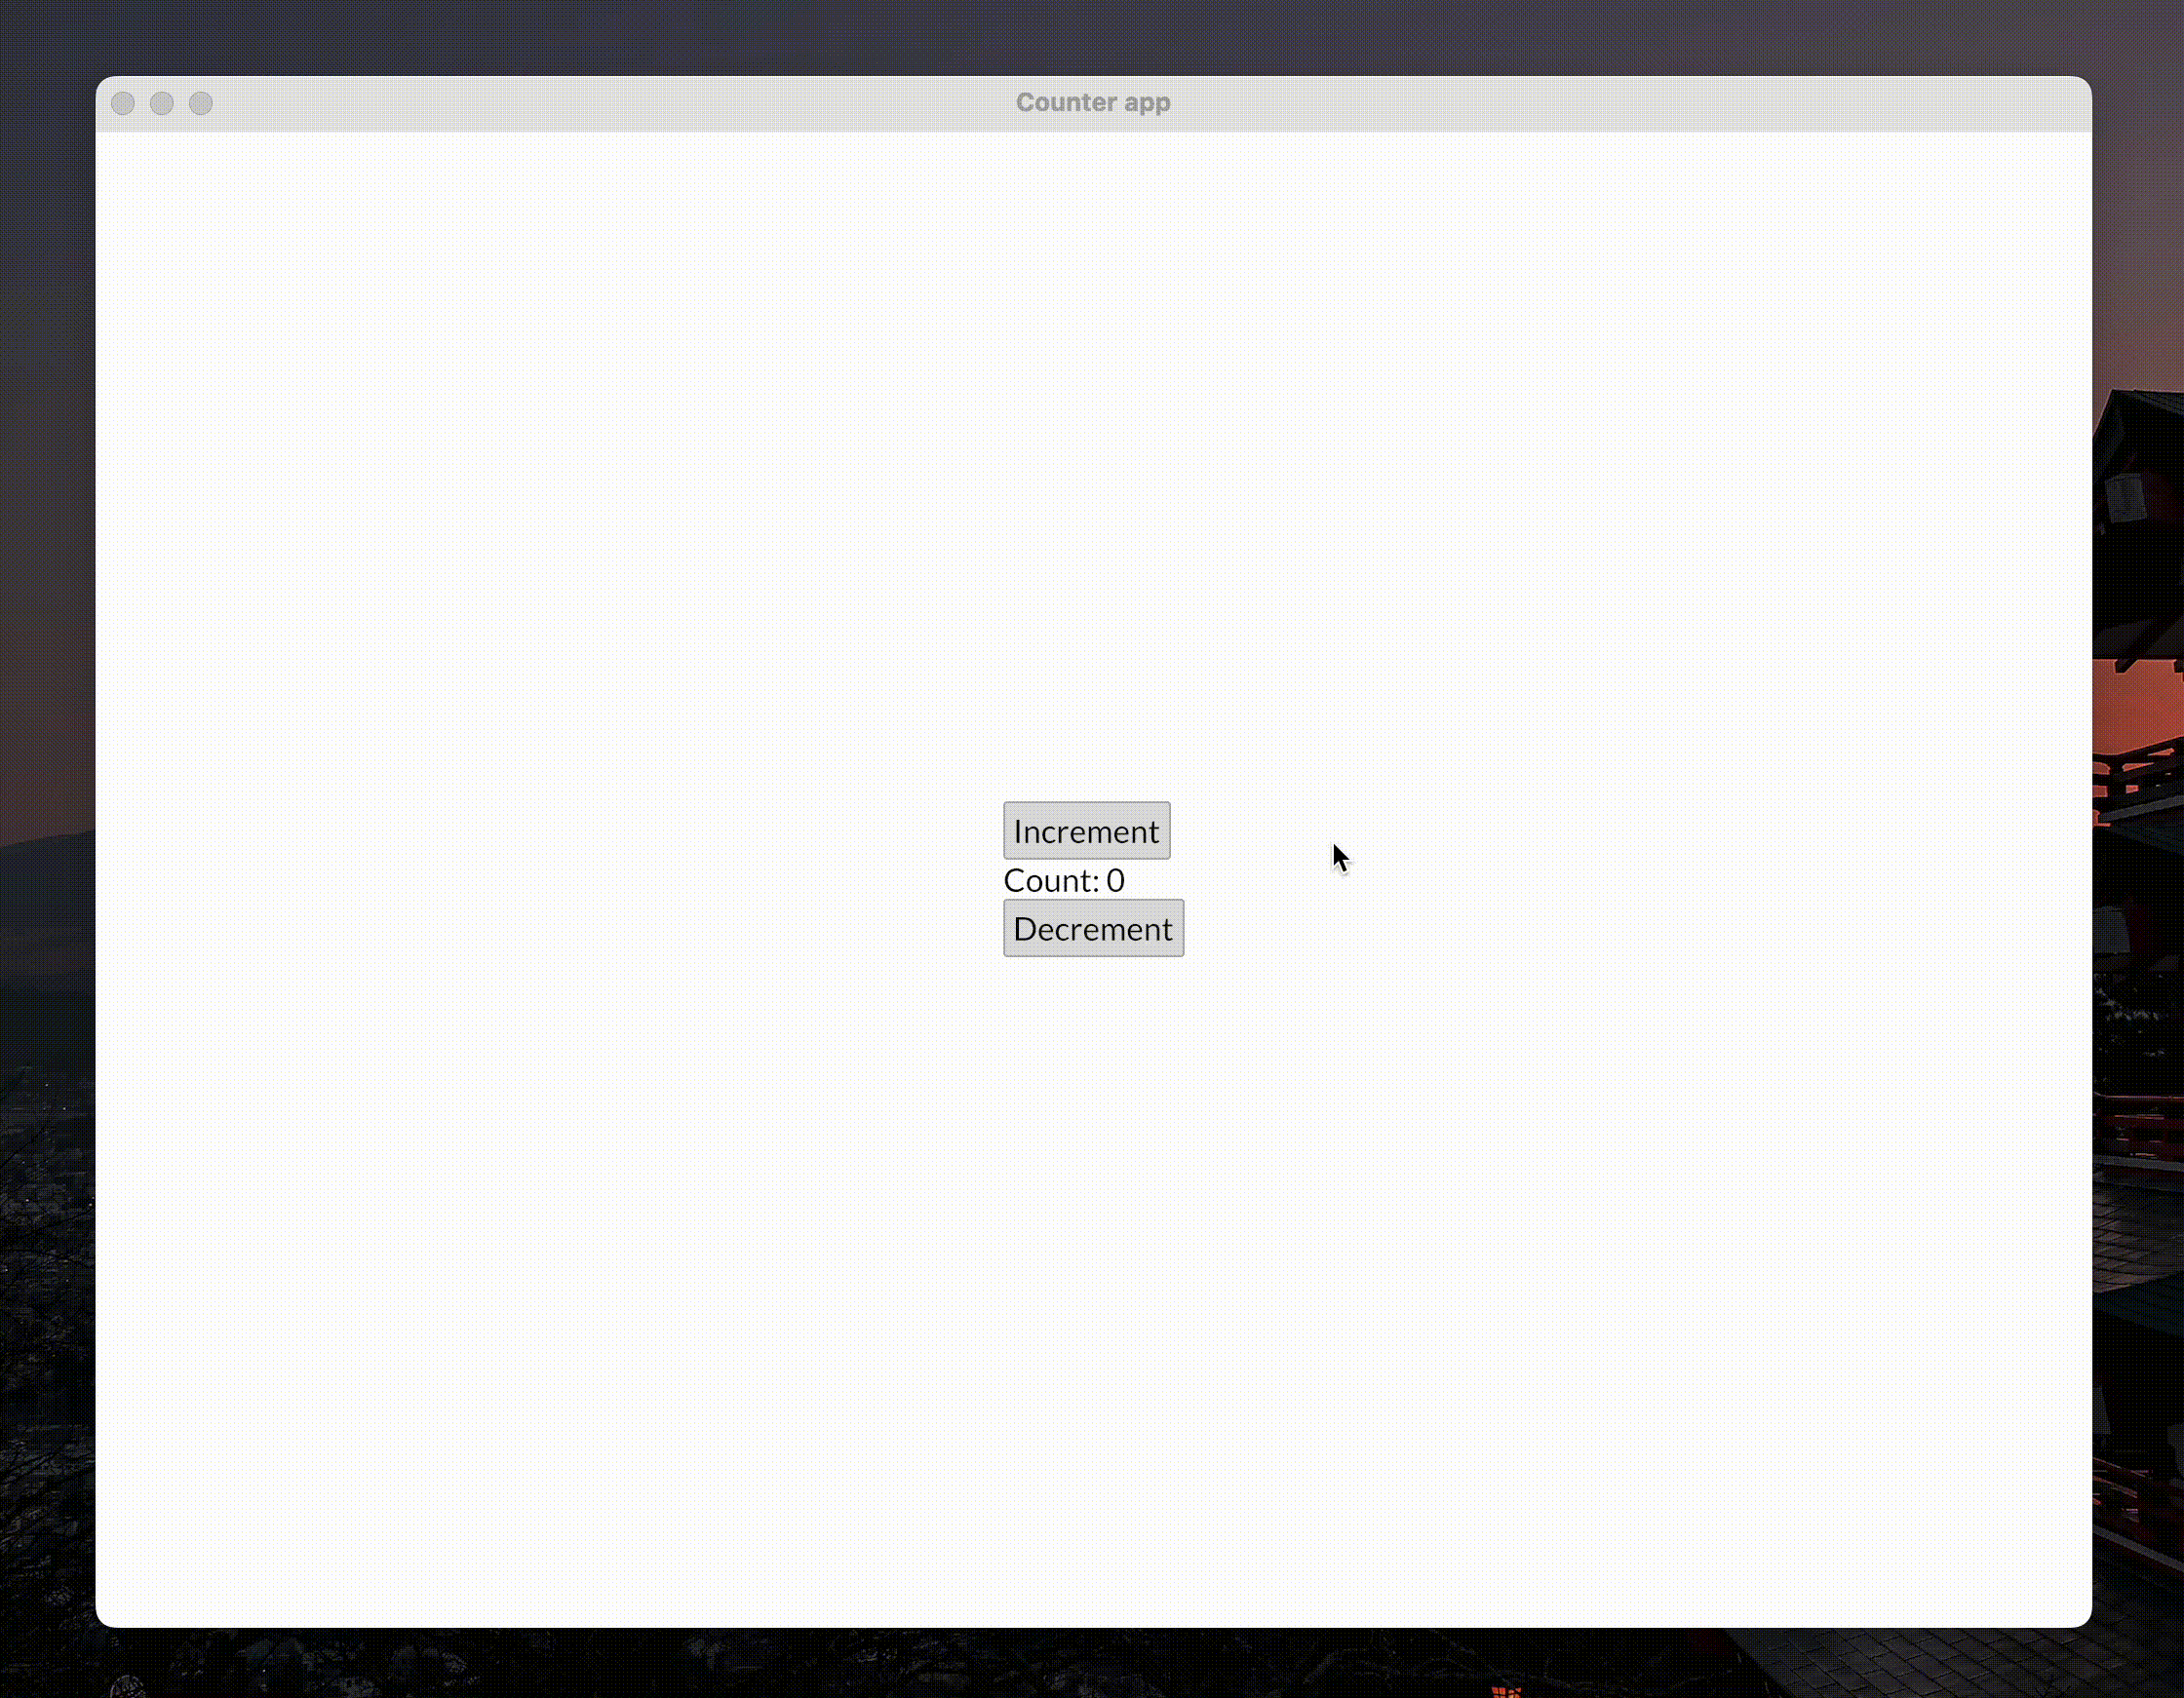
Congratulations you just created your first GUI app in rust and iced.
You now understand the basics of Elm architecture, difference between retained and immediate modes and basic of iced library.
Next steps
I would advise you to have a look at iced examples in the official repo, API reference to get familiar with other components of the library and join official discord server. The maintainer of the library and other contributors are super-easy to reach out to for help and any other questions.
Next tutorial will probably be dedicated to conditional view rendering and nested Messages.
If you have some feedback, comments or questions, I would love to hear them. You can start a discussion on github or email me. I am also active on the official iced discord server where you can chat with many other contributors.